
Die Kuppel
Die Konstruktion so einer drehbaren Kuppel stellte für mich eine echte Herausforderung dar. Im Prinzip ist ja alles klar, doch der Teufel steckt wie überall im Detail! Die Maße müssen sorgfältig durch gerechnet werden und es gibt unglaublich viele Dinge zu beachten. Am Ende muss ja eine absolut stabile, wasserdichte und vor allem sturmfeste Kuppel dabei herauskommen. Testen und ausprobieren ist nicht, bei der Endmontage muss alles 100%ig passen! Es hat sich ein weiteres Mal der Einsatz einer preiswerten CAD-Software gelohnt. Am Errechnen aller Maße der verschiedenen Spanten wäre ich sonst wahrscheinlich gescheitert.
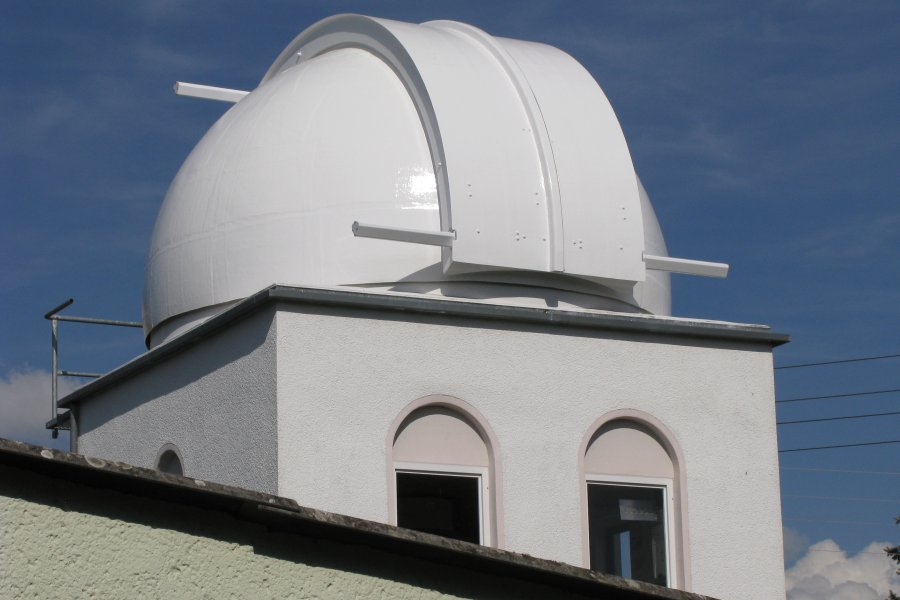
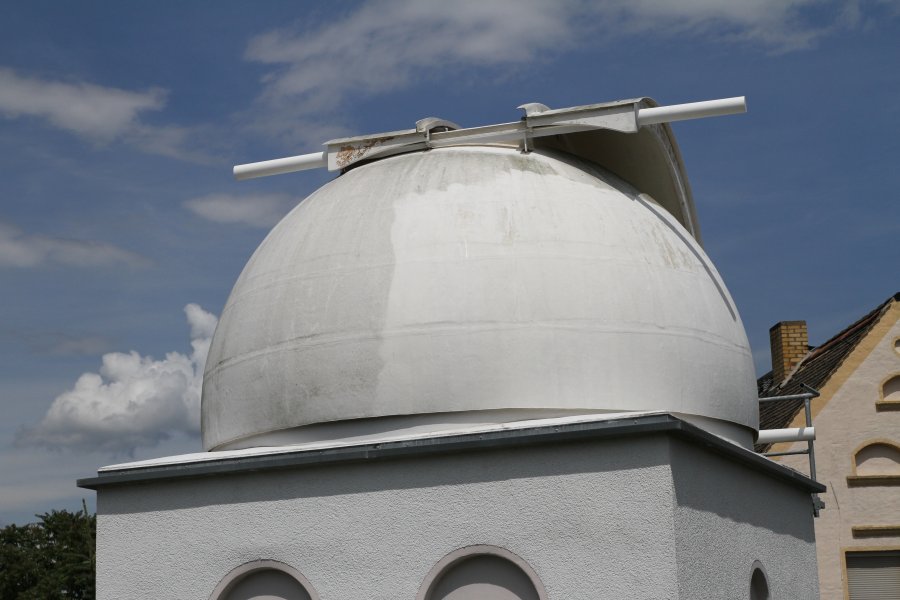
Hier nun das Ergebnis meiner vierwöchigen Planungen. Die Kuppel hat einen Außendurchmesser von 4,10m und besteht zum größten Teil aus GFK. GFK (Glasfaserverbundwerkstoff) wird aus Epoxydharz und Glasfasermatten selbst hergestellt. Vorteil: leicht, stabil und witterungsbeständig. Nachteil: Arbeit ohne Ende! Das Gesamtgewicht der Kuppel beträgt etwa 500 kg, auf 16 Rollen lässt sie sich leicht von Hand drehen. Die Zukunft wird aber sicher auch noch eine Motorsteuerung bescheren.
|
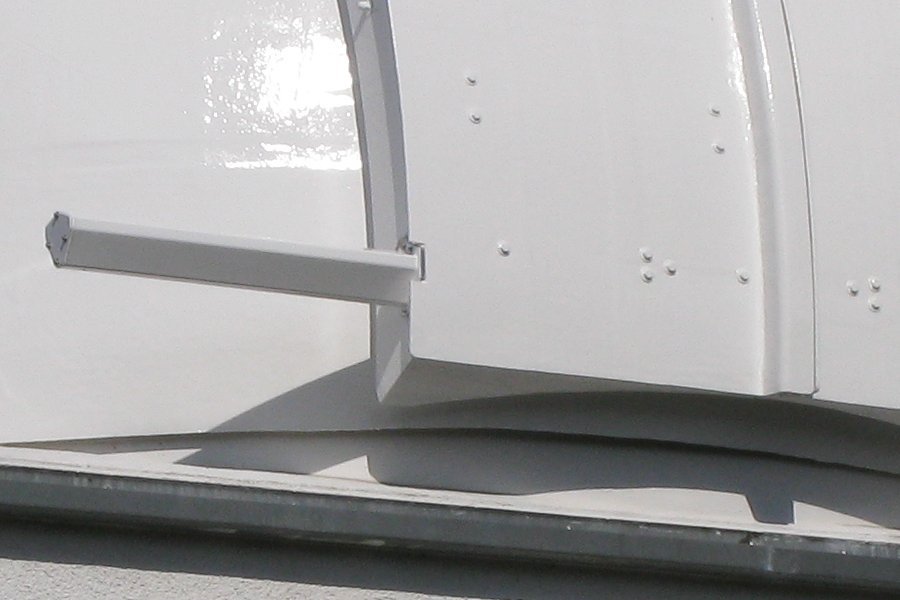
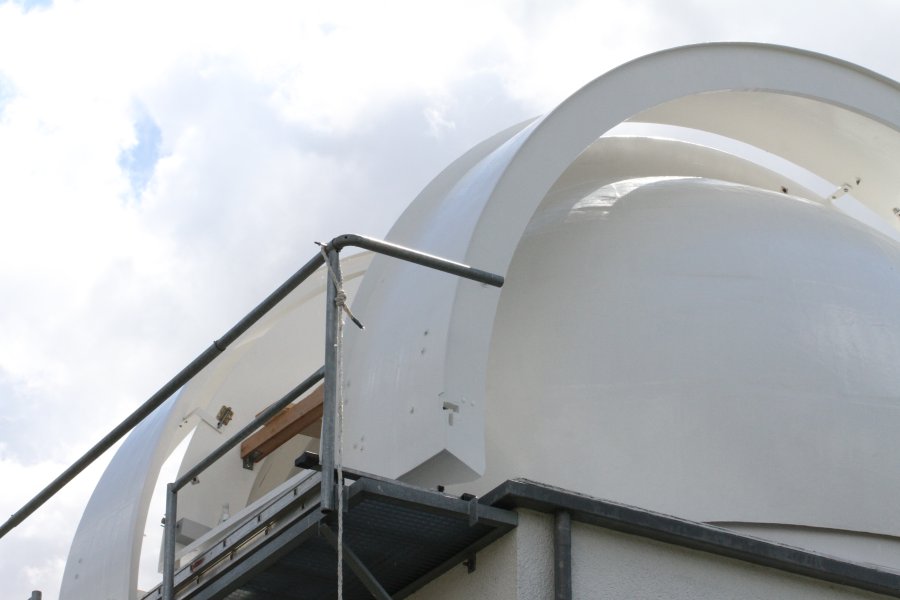
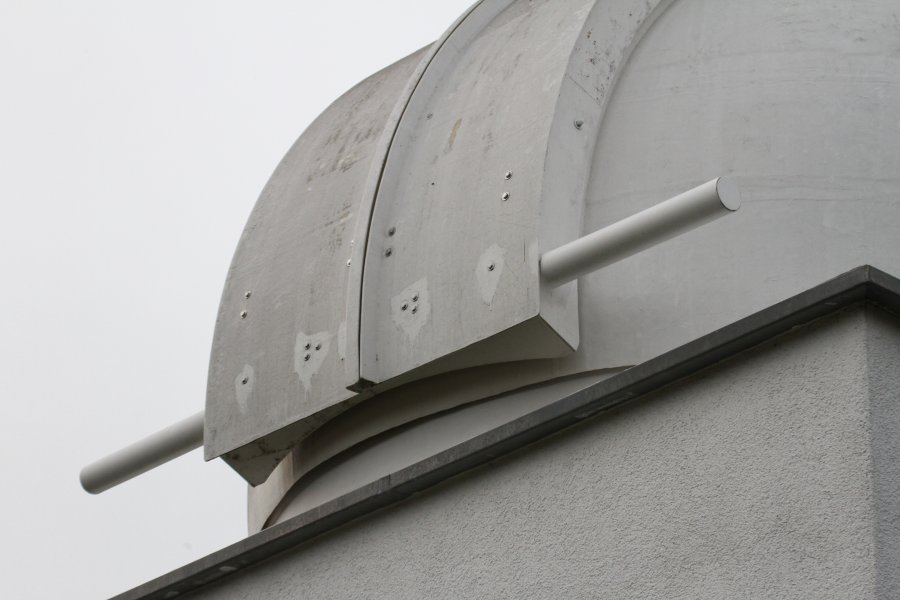
22.08.2012 - Fertig!!! Links: Der abnehmbare Laufschienenschutz. Rechts: Endlich ist die Kuppel wirklich fertig - zumindest von außen. Nun kann der Winter kommen. Bei all dem Aufwand hoffe ich nun wirklich, das der neue Anstrich mindestens die nächten 10 Jahre Sonne, Wind und Wetter trotzt... |
|
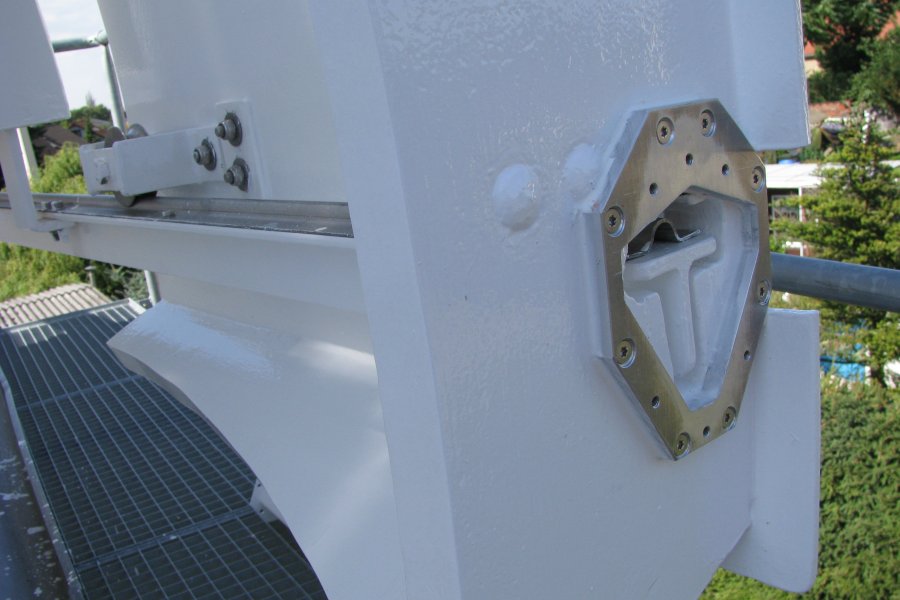
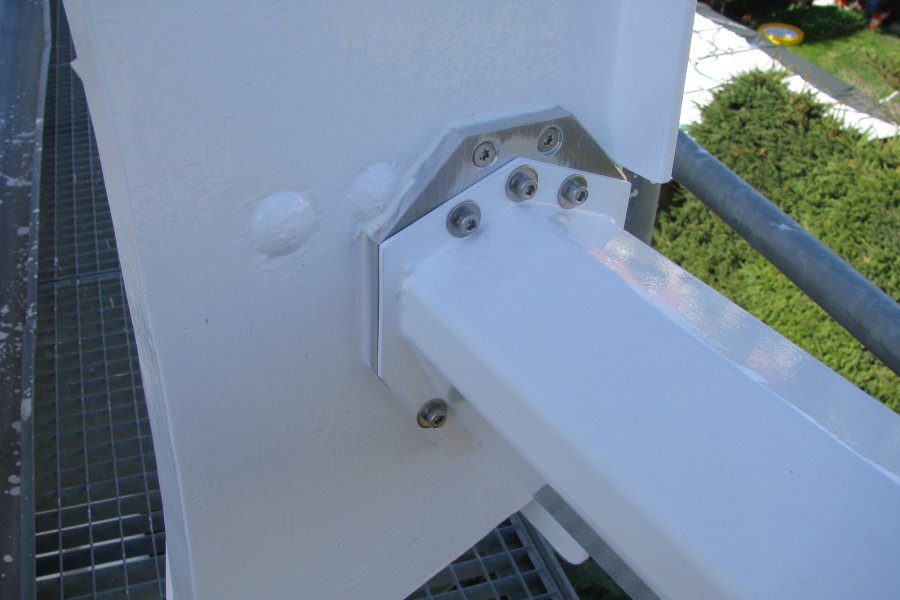
22.08.2012 Die Gelegenheit war günstig: ich habe gleich noch den Laufschienenschutz mit gewechselt. Links: Zur sicheren Verbindung habe ich für jede der vier Laufschienen der Tore einen Flansch gefräst. Rechts: Nun kann man einfach den Laufschienenschutz an- und abschrauben. Lackiert hatte ich die Teile natürlich gleich parallel zur Kuppel. |

|
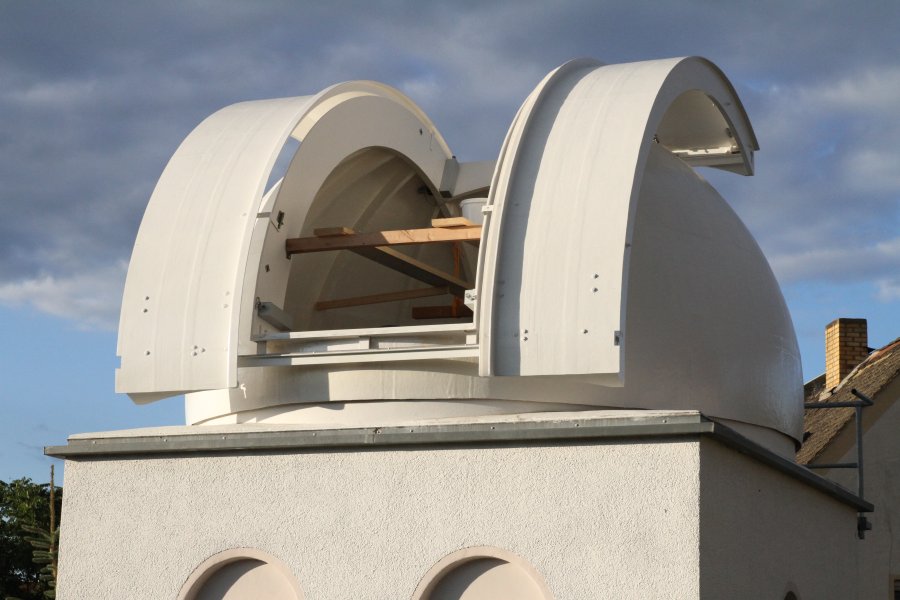
16.08.2012 Links: Das Wetter spielte immer noch mit. Nun kam der eigentliche Anstrich. Ich habe mich für 2 Komponenten Yachtlack entschieden. Das bedeutete genau 5 weitere Tage Arbeit, denn 35qm möchten erst einmal lackiert werden. Zwei mal 2K Vorstreichfarbe und drei mal 2K PU-Lack. Rechts: Es ist vollbracht! Die Kuppel glänzt derart, das man ohne Sonnenbrille Gefahr läuft, sich die Augen zu verblitzen! Was für ein Glück, der Zeitplan passte wie die Faust aufs Auge und der schon lange angesetzte Grilltermin der Sternfreunde konnte gehalten werden... ;) |
|
09.08.2012 Um alle Stellen der Kuppel hier in 8m Höhe erreichen zu können, baute ich innerhalb der Kuppel einen kleinen Laufsteg ein, so das ich ohne Probleme nun auch die Tore von oben bearbeiten konnte. Durch die 2008 angebrachte Trittfläche am Fuß der Kuppel konnte ich schon den Großteil der Kuppel erreichen. Ich wartete eine stabile Wetterlage ab und fing an die Kuppel komplett abzuschleifen - mit etwa 100 Blatt Sandpapier - eine ganze lange Woche! |
|
2012: Leider gab es massive Probleme mit der Kuppelbeschichtung. Das aufgetragene Gelcoat hielt der UV-Strahlung nicht stand. Erste Anzeichen konnte ich schon 2009 beobachten, als die Beschichtung plötzlich anfing vom Laufschienenschutz abzublättern. Damals grundierte ich diese einfach neu und überstrich sie mit Wetterschutzfarbe. In den letzten Jahren fing allerdings die ganze die Kuppel langsam an immer mehr Dreck aufzusammeln und wurde an manchen Stellen sogar grün, das Gelcoat kreidete aus und ab 2011 konnte man an vielen Stellen schon das GFK durchsehen. Spätetstens nun stand fest, da muss was getan werden. Also fing ich im Frühjahr an, die Kuppel Stück für Stück mit einem Kärcher zu säubern. Am rechten Bild sieht man die schon abgekärcherten Stellen. |

|
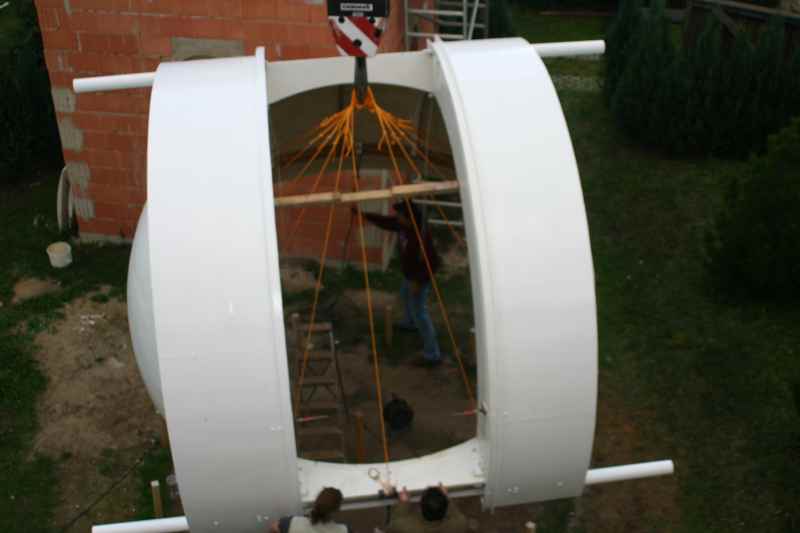
27.10.2006 Die Kuppel wird auf den Beton-Laufring der Sternwarte gesetzt. Dazu habe ich an jedem Spant ein Seil befestigt und diese 16 Stück dann mit einer Schlinge in den Kranhaken gelegt. Glücklicherweise waren viele Helfer dabei, so das die Sache trotz heftigem Wind ohne Probleme ablief. |

|
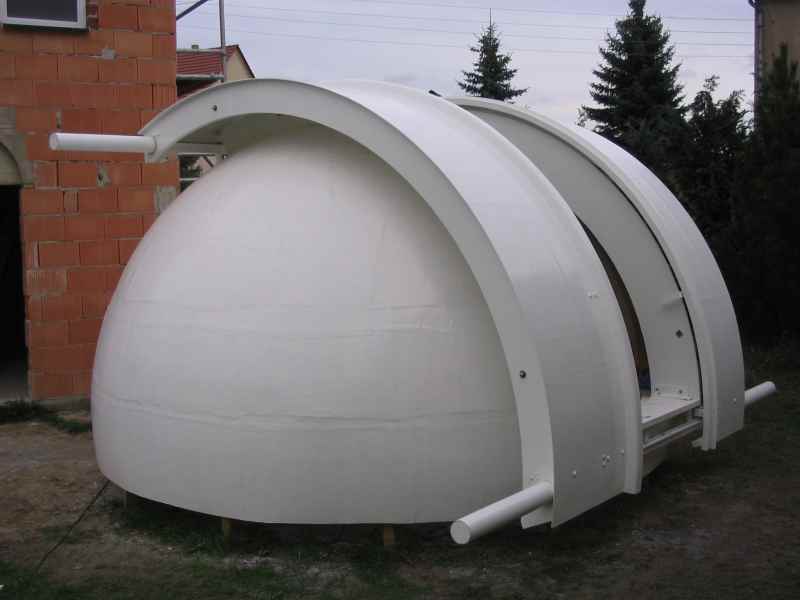
22.10.06 Heute war es endlich soweit! Die 4,1m Kuppel ist komplett, schön anzusehen ;)1,40m Spaltbreite lassen keine Wünsche offen. Öffnen und schließen kann man die Tore bequem über 2 Seilzüge. Im geschlossenem Zustand wird alles im Handumdrehen mit 4 Muttern fest verschraubt. (Sturmsicherung) |
|
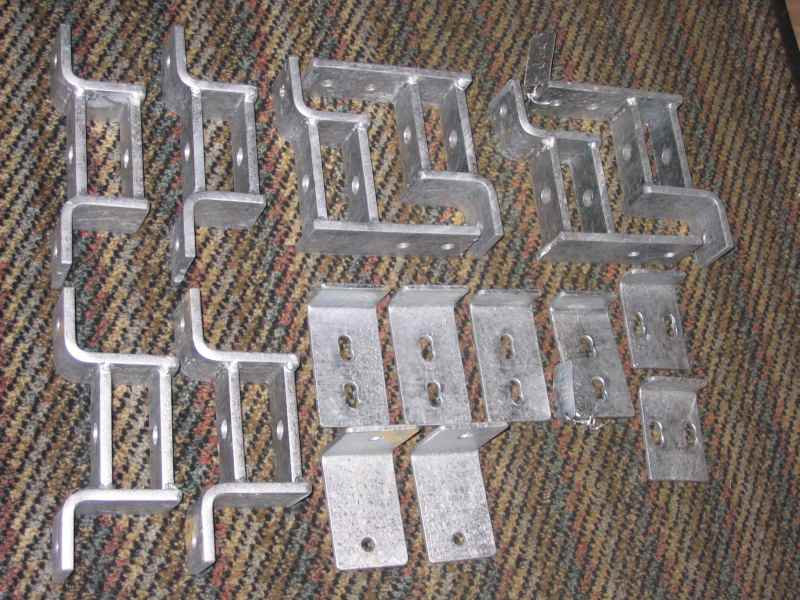
06.10.06 Die Tore bekommen ihre Rollen. Hier sieht man alle Rollenbefestigungen und die Aushebelschutz-Bleche. Vorher wurden die Tore aus GFK und Multiplexholz in der üblichen Weise gebaut und innen schon mit Gelcoat überzogen. |

|
16.09.2006 Heute hat mein Zelt aufgegeben, der permanente Sturm kam plötzlich aus der falschen Richtung... ;) Dies war jedoch kein Problem, ich hatte gestern die letzte Schicht Gelcoat aufgebracht , welche nun abgebunden hat. Glücklicherweise !!! war die Temperatur in den letzten 24 Stunden nicht unter 20°C gesunken! :) |


|
28.08.2006 Das Wetter spielt nicht mit! Kein Problem, ich habe ein 6m x 6m großes Zelt gebaut, es ist 4,5m hoch und hat schon den ersten Sturm überstanden! Genügend Platz, um ohne Probleme die Kuppel von allen Seiten bearbeiten zu können. |
|
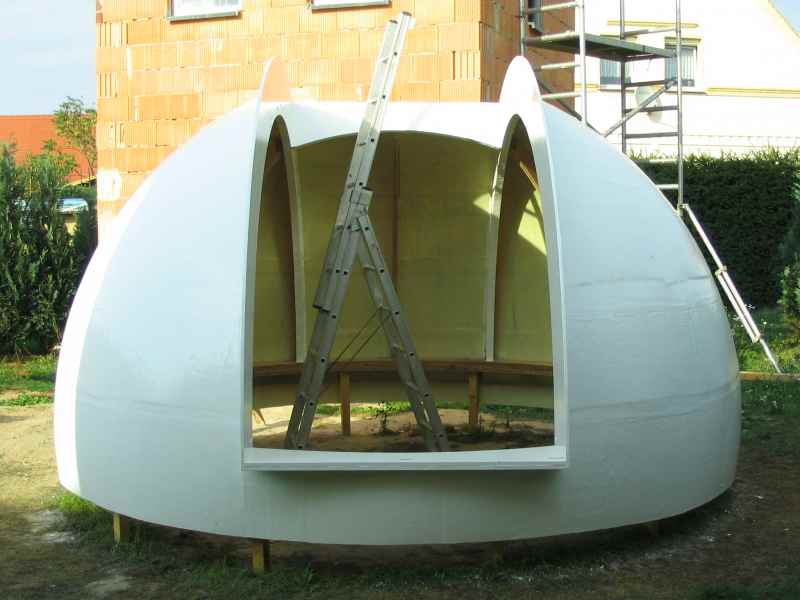
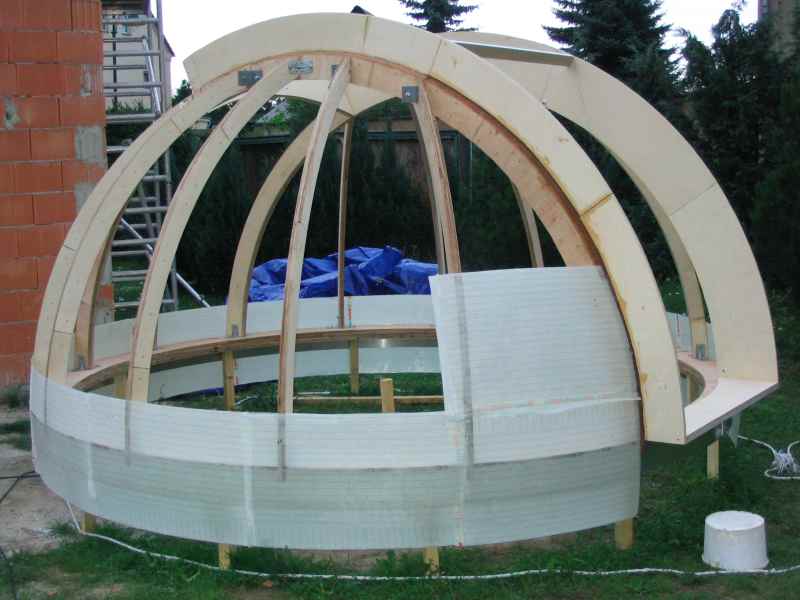
23.08.2006 Alle Spanten sind verklebt und verschraubt. Nun können nach und nach die GFK Formstücken angeklebt (und kurz angetackert)werden. Dazu nutze ich meinen vorhandenen Epoxydharz und mische etwas Thixotropiermittel unter. Der Harz tropft dann nicht mehr ab. Vorher habe ich die Spantenfront mit Polyurethan-Haftgrund behandelt. |
|
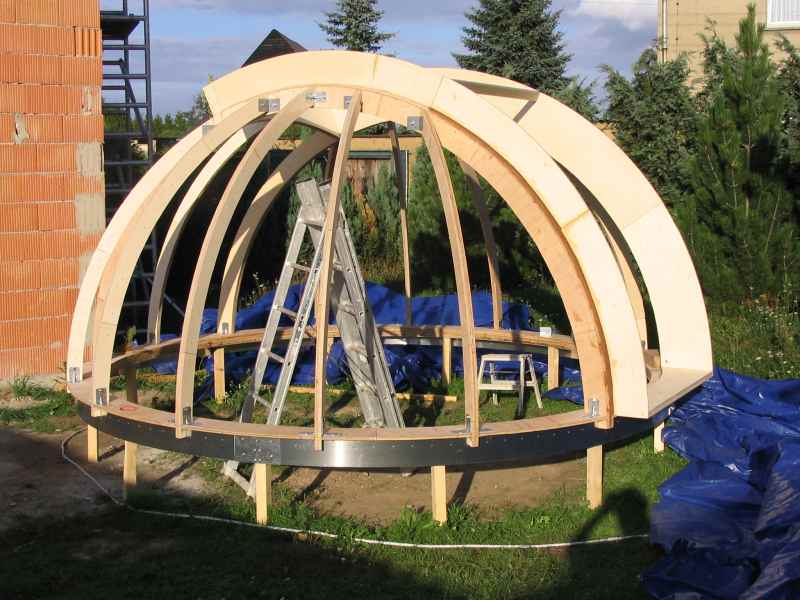
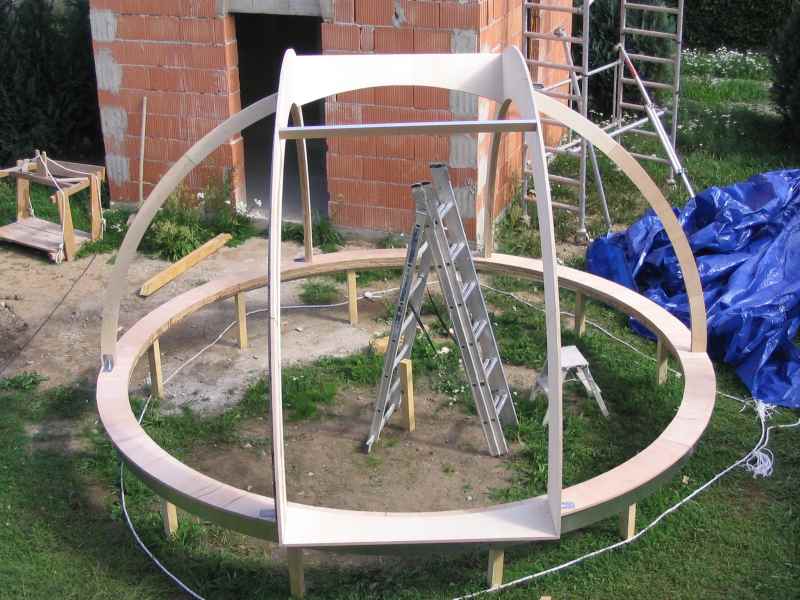
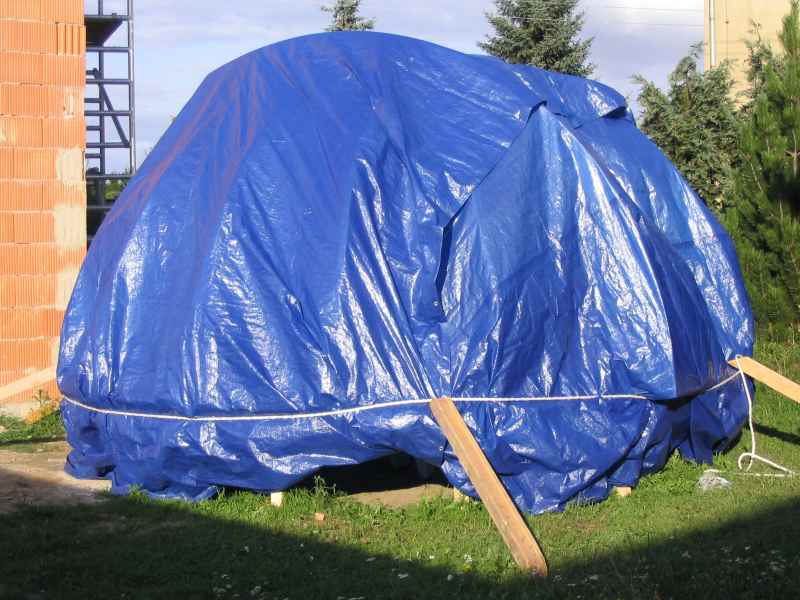
20.08.2006 Heute habe ich das Spantengerüst zusammengebaut. Leider habe ich nur das eine Foto, denn ab Mittag kamen immer wieder Regenschauer, so das ich umständlich unter einer Planen-Abdeckung arbeiten musste. |


|
12.08.2006 Es wird Zeit, die Kuppel zu bauen. Nachdem ich 12 Pfähle 6x6cm mit einem 5 kg-Hammer in den Boden rammte, habe ich diese mit einem geliehenen Laser-Nivelliergerät ausgerichtet und darauf den Grundring zusammengebaut. |
|
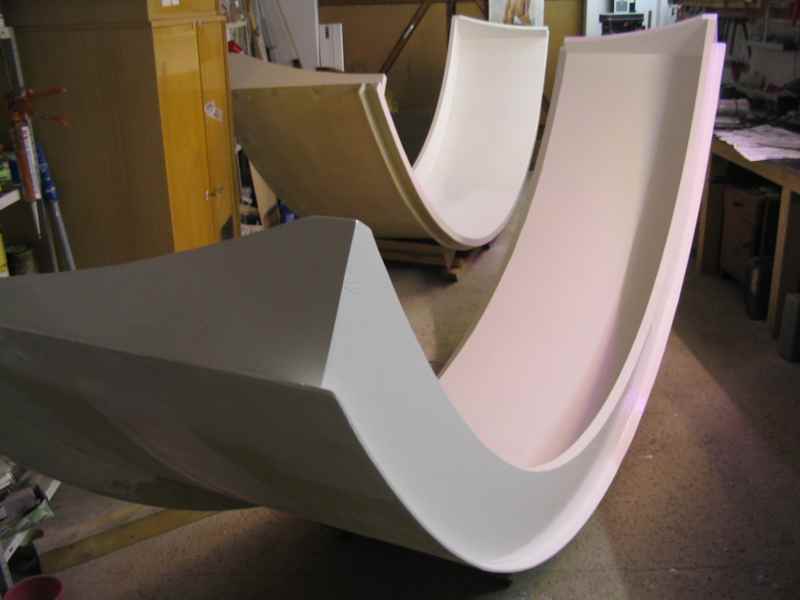
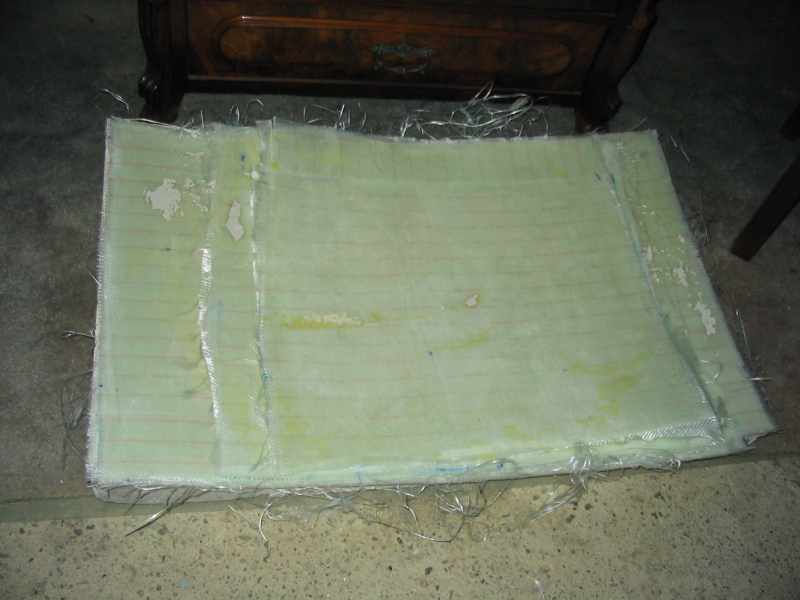
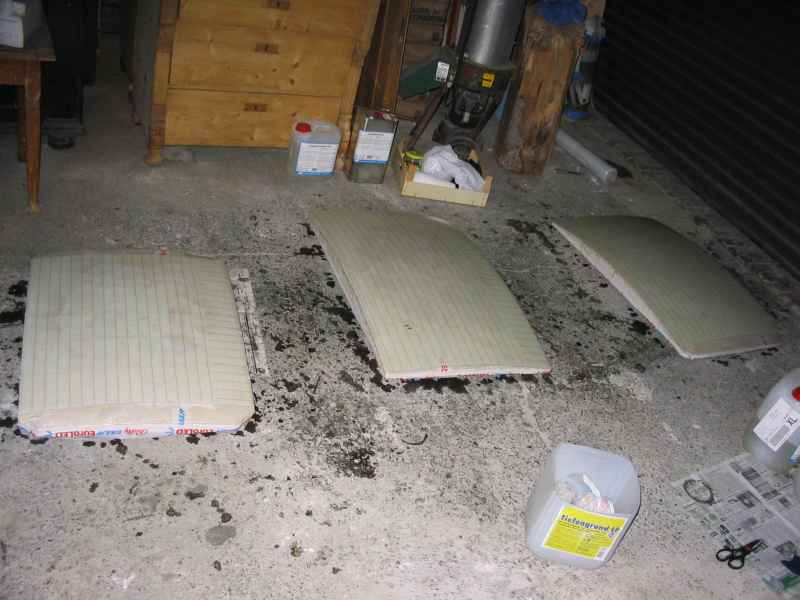
30.07.2006 Die fertigen Segmente lagere ich im Gipsformnegativ. So beuge ich eventuellen Verformungen beim nachhärten vor. Die ausgefransten Ränder werden noch abgeschnitten. Später werden die Teile auf das Spantengerüst geklebt. |

|
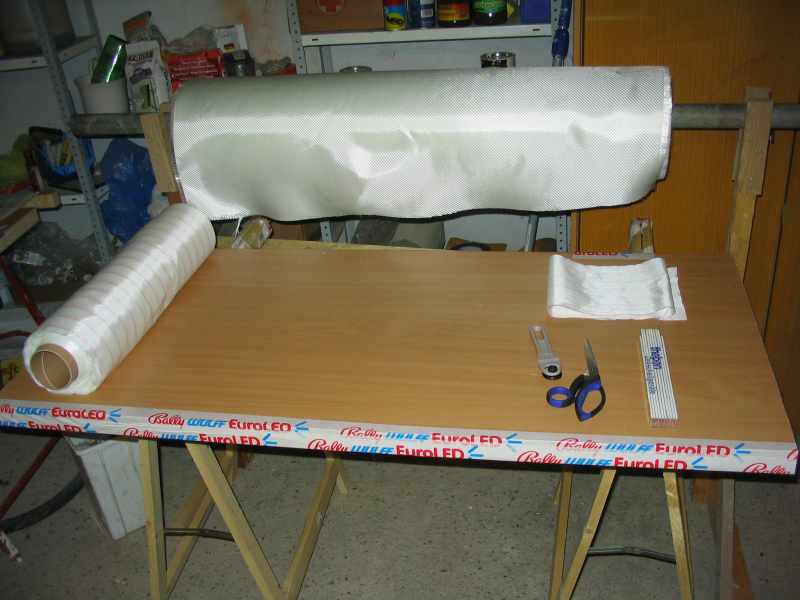
27.07.2006 Die ersten der etwa 50 Kuppelsegmente werden aus 2 Schichten 390g/m² Glasfilamentgewebe und Epoxydharz auf den Gipsformen gefertigt. Auf die oberste Schicht wird Abreißfolie eingearbeitet, damit sich die späteren Schichten gut verbinden. Beim abnehmen ist leider eine 2mm dicke Schicht von der Gipsform abgeplatzt. Das Trennmittel funktionierte wohl nicht richtig. Nun bespanne ich vor dem Laminieren die Form mit Stretch-Folie. Das funktioniert gut. |
|
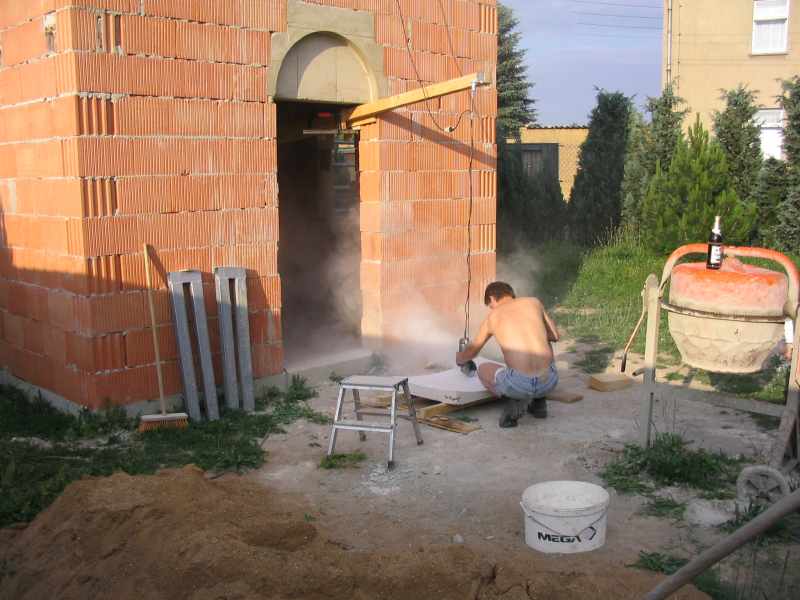
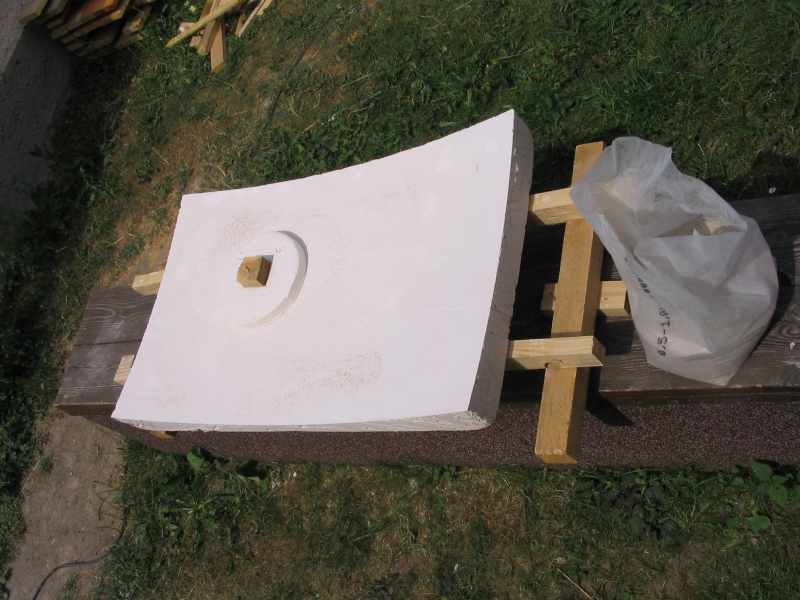
25.06.2006 Nachdem ich 1 Sack Gipsputz in die Form gebracht habe, war ich gestern dabei, den Kugelausschnitt zu optimieren. Dazu habe ich eine Flex an einer Armierungsstange befestigt und an einem Kugelgelenk pendeln lassen, bis alle Unebenheiten beseitigt waren. Hinterher wurde noch mit einem angepassten Gipstool und Quarzsand geschliffen. |
|
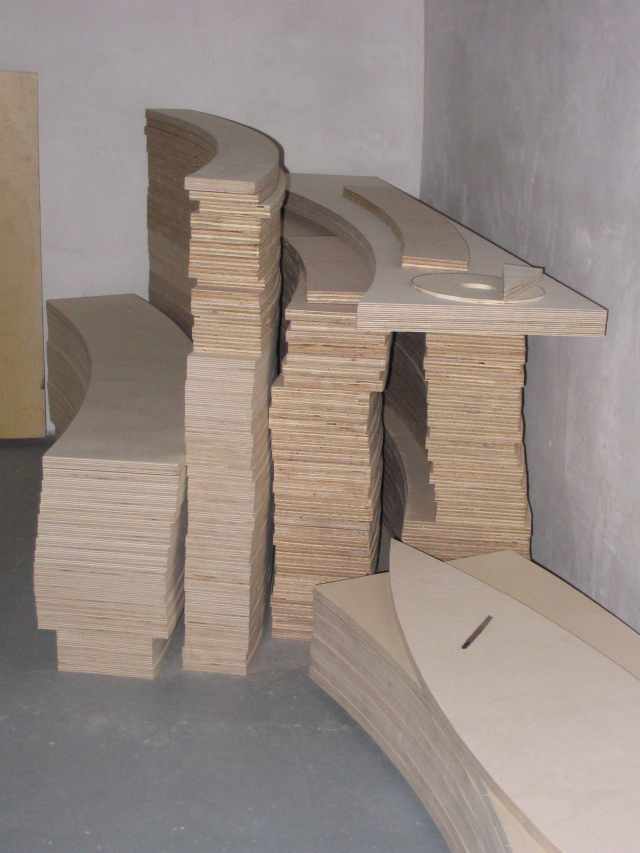
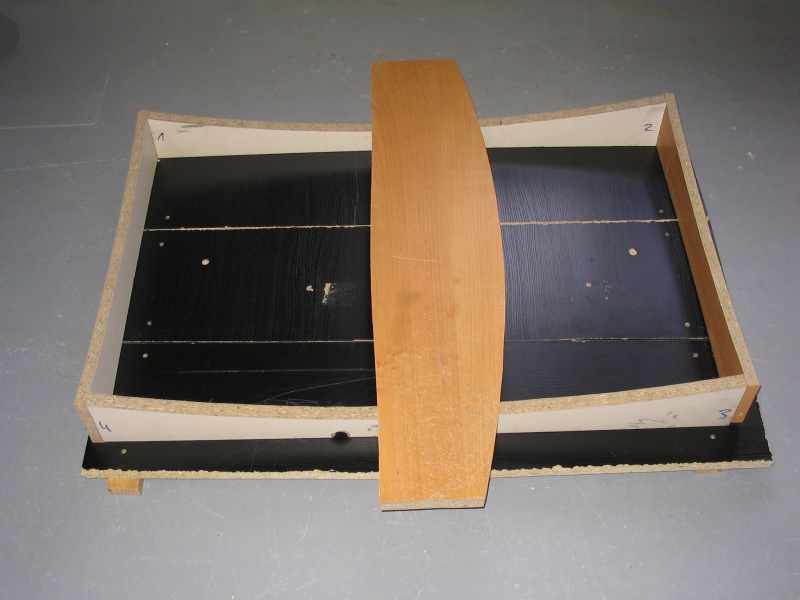
02.06.2006 Alle Spanten sind gesägt! Die Form werde ich mit Gipsputz ausfüllen und dann mit dem Abzieher die Kugelform r=2050mm in die Masse bringen. |

|
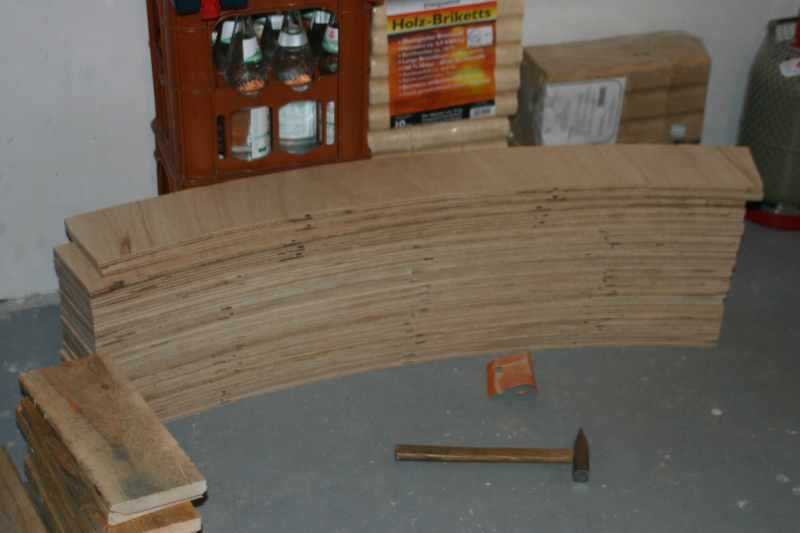
10.02.2006 Nach wochenlanger Planung konnte ich nun endlich mal loslegen. In 5 Stunden schaffte ich 20 GR-Stücken, also zwei der vier Grundringe. Langsam wird mir klar,wie viel Arbeit noch vor mir liegt... ;) |


|
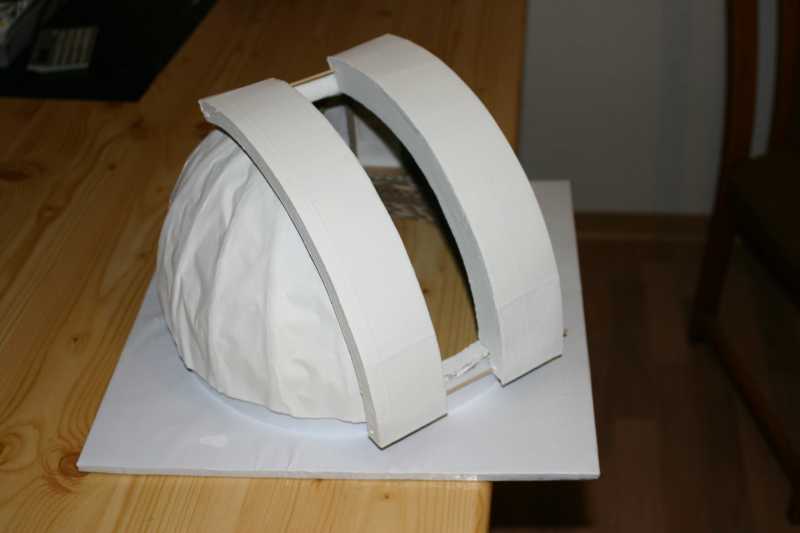
April 2005 Dies war mein erster Versuch, mich der Problematik Kuppelbau anzunähern. Gut das ich mit Pappe anfing, denn mein erstes Modell hatte einfach zu viele Schwachstellen. |


 18mm Multiplexplatten gibt es in der Standartgröße 1,22m x 2,44m. Ich brauche 12 Stück: